
You are using an out of date browser. It may not display this or other websites correctly.
You should upgrade or use an alternative browser.
You should upgrade or use an alternative browser.
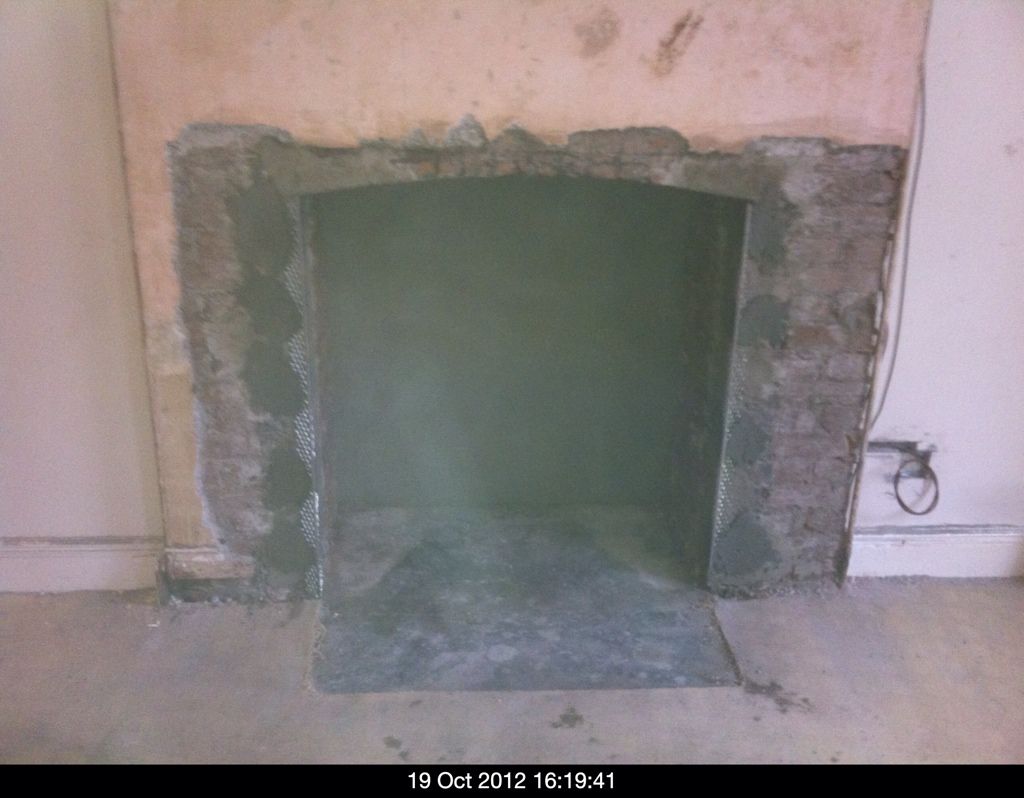
Curved chimney breast
- Thread starter FreeD
- Start date
Members online
Total: 603 (members: 8, guests: 595)
- Status
- Not open for further replies.

FreeD
Private Member
Thanks Mark, I'll give it another go, hadn't seen the job until today, i've freehanded these before but builder wanted it bang on, he showed me one downstairs and said I want it like that and I thought f**k lol
One last thing what did you mean by this?
'mark a level line each side then dab it up, as you have the sides'
Cheers
One last thing what did you mean by this?
'mark a level line each side then dab it up, as you have the sides'
Cheers
mark ross
Private Member
He means place your level across the aperture and mark each side where it meets the uprights
Thats it, also, if you have shapped your head first to fit across the aperture, then bead sides, offer the shapped head to the uprights upside down ( mirror of right way on), mark with pencil where they meet the uprights and cut. Shoud fit nicely then.
spread1970
Member
oh and make sure you plumb beads of the existing plaster.
Ashleyscoob
Active Member
Why not do it freehand easy enough to get that shape and skim with a external corner trowel or render it first then use a plastic arch bead but not if a wood burner is going inHow to you render the curve? I tried beading it, was a nightmare, I'm thinking of fixing hardboard underneath?
DannyMac
Private Member
Freehand it , then get your queenie out.
By queenie do you mean a flowery frock?
spread1970
Member
my auntie was called queenie.
DannyMac
Private Member
For the backing coat I would either freehand it or use a 2" plastic strip that window-fitters use. Then use a mesh skim bead for the finish coat, probs about the only time I would use one of them beads cos generally they're shoit :RpS_thumbup:
No they are great for slightly obtuse angles. And there's no "O" in sh1t:RpS_biggrin:

NPS
Private Member
why bead the reveals first? i cut the reveals to length then the head then hold the head and reveal up together and see whats what then nail onBit like beading a window, sides first always
DannyMac
Private Member
why bead the reveals first?
Because it's hard to guess plumb on both sides, but equally as hard to guess is the extra length added by the arch on the top bead.
So on balance after weighing it all up, it's all guesswork unless you trial fit like you say, but who can be arsed to do that...not me.
I say put the top bead on too long, plumb the sides up, and snip the extra length off the top bead where the sides meet it....carefully.
spread1970
Member
for the best curve would a profile under the head not be better?
NPS
Private Member
soz mate i was on about on a window not the fireplaceBecause it's hard to guess plumb on both sides, but equally as hard to guess is the extra length added by the arch on the top bead.
So on balance after weighing it all up, it's all guesswork unless you trial fit like you say, but who can be arsed to do that...not me.
I say put the top bead on too long, plumb the sides up, and snip the extra length off the top bead where the sides meet it....carefully.
- Status
- Not open for further replies.