
You are using an out of date browser. It may not display this or other websites correctly.
You should upgrade or use an alternative browser.
You should upgrade or use an alternative browser.
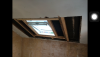
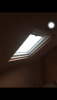
Beading velux window ?
- Thread starter Stanbra
- Start date
Nicm
Well-Known Member
Any pictures?.Do you use stop beads all the way around ? I've got a job to do where velux has been put in so need to board reveals and patch in round the ceiling round windows...
beader
Private Member
Just use thin coat angle beads.Any pictures?.
Nicm
Well-Known Member
I wanted to see the ceiling size where he was going to patch.If it was’nt too big i’d personally prefer to reskim it instead of patching.Just use thin coat angle beads.
beader
Private Member
His question was about what beads to use.I wanted to see the ceiling size where he was going to patch.If it was’nt too big i’d personally prefer to reskim it instead of patching.

ChrispyUK
Well-Known Member
Do you use stop beads all the way around ? I've got a job to do where velux has been put in so need to board reveals and patch in round the ceiling round windows...
I've done a few recently where the client wanted the wood surrounds removing and replaced with plaster.
I used stop beads, and skimmed reveals, but on the ceiing side, I carefully removed an inch or so of skim, bonded up to beads where necessary, scrimmed, then easifilled.
Perfect blend once sanded and painted.
Nicm
Well-Known Member
Right so,skim beads.His question was about what beads to use.
JessThePlasterer
Queen Jess Elizabeth I
I hate boarding reveals round veluxs’/veluxes/...veluxi? .... anyway, makes me feel like a dumbass 
customer doesn't want angle beads using as it will need skimming on ceiling side and look like its bulging out... But surely if I use stop beads I'll have to scrim on ceiling side up to stop bead and then skim/fether out ?I've done a few recently where the client wanted the wood surrounds removing and replaced with plaster.
I used stop beads, and skimmed reveals, but on the ceiing side, I carefully removed an inch or so of skim, bonded up to beads where necessary, scrimmed, then easifilled.
Perfect blend once sanded and painted.
ChrispyUK
Well-Known Member
customer doesn't want angle beads using as it will need skimming on ceiling side and look like its bulging out... But surely if I use stop beads I'll have to scrim on ceiling side up to stop bead and then skim/fether out ?
The customer I did it for had already had a few done some years previously and whoever had done it had tried to blend in with skim. They looked s**t tbf.
Here's what I did.
Remove existing wood reveals and architraves.
Re-board with foil back.
Ceiling side, get Stanley and cut depth of skim about 2" back from reveal. Carefully cross hatch with Stanley and remove existing skim.
Cut and fit stop beads using a straight edge to flush up with existing ceiling skim level.
Nail and use a bit of grip fill on back.
Carefully bond any gaps ceiling side.
Skim reveals with multi/board etc.
Scrim 'trough' created by skim removal on ceiling side up to stop bead.
Skim over this with easifil and sand.
Sorry to be pedantic. Wish I had pics, but you would never tell that new reveals had been put in.

Did you overlap scrim between old ceiling and bit you scraped out ?The customer I did it for had already had a few done some years previously and whoever had done it had tried to blend in with skim. They looked s**t tbf.
Here's what I did.
Remove existing wood reveals and architraves.
Re-board with foil back.
Ceiling side, get Stanley and cut depth of skim about 2" back from reveal. Carefully cross hatch with Stanley and remove existing skim.
Cut and fit stop beads using a straight edge to flush up with existing ceiling skim level.
Nail and use a bit of grip fill on back.
Carefully bond any gaps ceiling side.
Skim reveals with multi/board etc.
Scrim 'trough' created by skim removal on ceiling side up to stop bead.
Skim over this with easifil and sand.
Sorry to be pedantic. Wish I had pics, but you would never tell that new reveals had been put in.
ChrispyUK
Well-Known Member
Did you overlap scrim between old ceiling and bit you scraped out ?
Just carefully remove old skim on ceiling back down to the PB. Scrim goes in trough which overlaps the edge of reveal board and up to stop bead. Flat edge of stop bead is on reveal board. I used a bit of bonding first if there was any gaps between reveal board and ceiling board.
ChrispyUK
Well-Known Member
Did you overlap scrim between old ceiling and bit you scraped out ?
You don't want the scrim overlapping onto the existing ceiling skim. You're removing a bit of the skim to keep the scrim below the skim level so there's no bulge when you easifil.
essexandy
The Lake Governor
If you use Catnic beads don't buy/ask for 'thincoat' as they allow for more thickness, ask for/buy 'drywall' beads. Even some merchants don't realise that they are different.Just use thin coat angle beads.
JessThePlasterer
Queen Jess Elizabeth I
Arti
Well-Known Member
If its splayed use 135 degree beads rather than stop. More expensive but easier to keep straightDo you use stop beads all the way around ? I've got a job to do where velux has been put in so need to board reveals and patch in round the ceiling round windows...
ChrispyUK
Well-Known Member
JessThePlasterer
Queen Jess Elizabeth I
ChrispyUK
Well-Known Member


jamesthefirst
Private Member
I find the catnic can be inconsistent and mostly use thin coat skim beads. I’ve found the catnics can sometimes be out of square and a pain to fix.
essexandy
The Lake Governor
Catnic thincoat beads are out of square because they're made to allow for a coat of Bonding before skimming. Drywall beads are square and allow for a thin coat of skim. Well about 3mm to be fair, which is less than a lot on the market.I find the catnic can be inconsistent and mostly use thin coat skim beads. I’ve found the catnics can sometimes be out of square and a pain to fix.
Vincey
Private Member
Hate skimming velux windows, they look great when they are finished and are great in a room especially for light though
I always try to use stop beads but if use thincoat angles I fill them out first sometimes there’s at least 5mm plus to loose depending on the angle imo if you try to loose that in one hit they can look s**t and wavey

I always try to use stop beads but if use thincoat angles I fill them out first sometimes there’s at least 5mm plus to loose depending on the angle imo if you try to loose that in one hit they can look s**t and wavey
Sorry for the late reply... But I did exactly this and turned out a good job. Cheers !!
ChrispyUK
Well-Known Member
Sorry for the late reply... But I did exactly this and turned out a good job. Cheers !!
Cool. Glad it helped