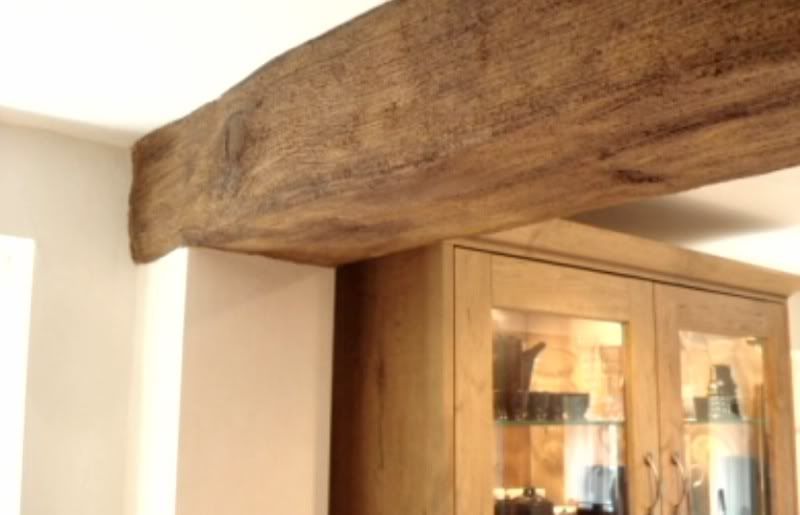
Oak beam

Members online

Status
Not open for further replies.
Here's one I done a while back

Pictures by bigal4444 - Photobucket

006.jpg
007.jpg
 
Last edited:
I think that one was done over a few days.
We took the wall out and fitted the RSJ too.
That was my first ever attempt.
Ive done a few more since then that were done in a day.

Much more satisfying than ordinary plastering
 
i've done a few of them, never thought to take any pictures though. will do next time. i use a brush, a fork and a cork to create the grain and knots
 
Have I been asleep or something or all of a sudden everyone can do reproduction wooden lintels?
 
last one we did was on an RSJ like the video, board it, shamfer the angles so they are about 45 degrees. we added an odd shaped bit of board to one side to make it look less uniform, skim it, then while its still wet use a brush to create the grains. use a small tool to create any splits in the wood and if you dot a cork on it, it creates a knot. just remember to brush around the knock so it looks like the grain flows around it. thats pretty much it.
 
They are suprisingly easy.
I use a wire brush, bits of sweeping brush, small tool, gauging trowel.
Anything realy.
I had an old chunk of wood as a model and the client was well impressed.
I stabbed some 'worm holes' with a pin and a friend of the client told them to get the woodworm treated.
Theres not a lot of work doing these but its good fun
 
Easiest way to do them is tap a piece of rough sawn timber into the wet plaster,
temporarily held in position till the plaster has firmed up.
Then remove & voilà :RpS_thumbup:
Put a bit of oil on the timber first so it removes easly:RpS_wink:
 
I've done em both ways in the past.
Getting the colour rite is important otherwise they look total 5hit:RpS_biggrin:

Yours looks good bubbles:RpS_thumbup:
and that one in the vid.
What did you use for the stains etc bubbles?

The last one I did i gave it a coat of magnolia matt emulsion first so it was like a pine coloured base coat, then a coat of teak stain, then mixed a bit of black paint with a bit of stain & touched up some areas of the beam to darken them slightly, then gave it another coat of teak stain.
Looked good.
 
I gave it a mist coat and then a water-based stain, can't remember what it's called though........
 
I was told by an old plasterer a few years ago that the stain or colour should be applied when the plaster has set but before it has dried out. Pretty much the same day.
I tried it on a couple and it worked well.
Once i made a nice detailed two part beam (t shaped) and the client left it to dry. When she stained it did not absorb in places and looked patchy so she painted it magnolia!
 
She probably used an oil based stain then.
A water based stain wouldn't do that.
But she should've still put a base coat of something on then the stain would go on easier.

Never heard of putting stain on set/damp plaster, as oil & water don't mix so I'd have thought it'd slide all over the place while brushing it on?
 
Last edited:
i sumtimes use a float on a ceiling, and it gives a woodgrain affect,breaks up the all the ceilings and the rubbing!!!
 
I have to say, this is the first time i've seen this and it looks awesome, my dining room is a knock through and i may be tempted to have a little play in the spring time. :glare: (cue diy sos!! lol)
 
Smart as f*ck! I can do all round plastering, screeding and to a lesser degree drylining but i've been shown fancy stuff like this. Those stones look really real, must take ages but well worth the result i reckon. Cheers chaps.
 
Those of us of a certain age made good money years ago from mock tudor beams and a bag of artex LOL.
 
Status
Not open for further replies.
Top